Sunday, March 31, 2013

Pin Casing for Elastic Tutorial


You will need all of your diaper layers, pins, and a piece of elastic cut to the correct length. Put a safety pin in one end of the elastic.

Pin together all the layers a little inside your line for the edge of the diaper, far enough away that the serger doesn’t eat the elastic! Pin from one elastic mark to the other about 1 inch between each pin.
*The pink line is the line that I drew to help me feed into the serger blade. It is the finished shape of the diaper.
Open the hidden layer and the inner layer and put the safety pin end of the elastic into the case created by the pins.
When you feel the end of the elastic getting close to the elastic mark, pin the elastic through all the layers. Continue feeding the safety pin through the pin casing.
Pull the safety pin end through until it has gone to the last casing pin. Your diaper edge will be gathered looking. Pin the end down. You probably know the rest and I didn’t take pictures of it J

Tack the end of the elastic down with a zigzag stitch, going back and forth several times to secure the end. Change to a 3 step zigzag. Put the needle in the down position. Pull on the diaper to stretch the elastic and make sure the diaper is straightened. Stitch on top of the elastic, removing pins as you come to them. When you get to the other end, switch back to zigzag and tack it down. Again, be sure to go back and forth several times so the elastic is secure.


Thursday, November 22, 2012

Finally!

I finally finished the quilt for my friend's baby! I had a goal of finishing it before going into labor. The final stitches of the binding are complete, as I sit here having contractions and wondering how labor on Thanksgiving might be. Not sure if today is the day yet but it could very well be. I guess we'll know soon enough!


Saturday, September 22, 2012

A busy day! Nesting?

So, since yesterday around 6:00 pm I have.....

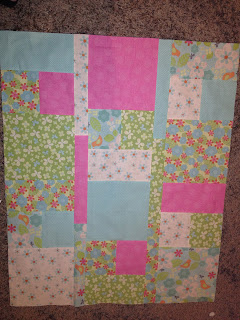
-cut and sewn a crib size quilt for a baby girl *and I'm having a boy!*
-quilted said quilt,
-sewn a cloth diaper,
-made a vinyl changing pad, and
-prepared Finn's quilt top for hand quilting while at the mountains this week.

As soon as I sew on the binding of the girl quilt I'll post pics. As for Finn's, we'll see how long my creative streak lasts! I hope to have it completely quilted by the time I come home next weekend but you never can tell!

Here are the pictures I have so far.


Wednesday, September 19, 2012

Pinterest success story

I pinned this months ago and now the pressure of my pregnancy getting close to its end, I finally got around to it! This blanket was super easy to make and now we have a blanket ready for the hospital bag!

Tuesday, June 19, 2012

Quilt

So, after this quilt sat around for a year waiting, I finally got around to hand quilting and binding it. I don't know why, but I procrastinate so bad on binding!

Now on the agenda for this summer... I have two baby girl quilt tops already made that I need to pick backing and binding for and fabric for a boy quilt in case hubby's hunch is right about baby #3 being a boy! Lots to do and 6 weeks to do it before school starts back!

Wednesday, May 23, 2012

I did!

The teacher gift quilt was done 3 days early! I can hardly believe it. And school for me ends 2 days early because we didn't take half days. Not a bad surprise at all!

Friday, May 11, 2012

I have to learn to say NO!!!

So, it's the end of the school year. I have report cards to finish. I have conferences. I have Lu's dance recital coming up. And I agreed to make a quilt as a teacher gift for my friend's daughter. WHAT was I thinking? I have to learn to say no!!! I think I can, I think I can, I think I can, therefore I always say "yes" or "okay" or "sure." Next time, I'm going with "I think I can't!" and "No!" Pictures coming soon......